Splicing cut tape is an essential step in the PCB assembly process, and it is the process of joining two pieces of tape to make a single piece. It allows you to join two different reels of components, or to join add in additional cut tape, without interruption in the assembly process. This guide will walk you through the step-by-step process of splicing cut tape, making it easy for you to understand and apply in your own assembly process.
Things you will need:
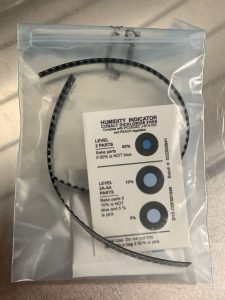
Note: You will need pull tape and joining tape for each size tape you use. (8mm, 12mm, 16mm, etc.)
Splicing Cut Tape: A Step-by-Step Guide
By following this guide, you will be able to efficiently and effectively splice cut tape, ensuring a smooth and successful assembly process.
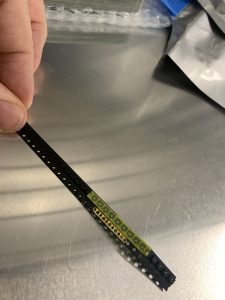
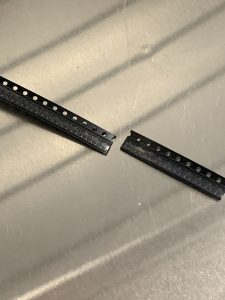
- Start by laying the two pieces of cut tape next to each other, with the pin holes facing away from you. This will ensure a proper alignment of the tapes.
- Next, take a splicing rivet and place it in your crimping tool. This rivet will be used to hold the two pieces of tape together.
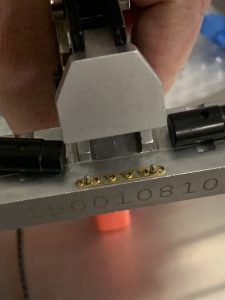
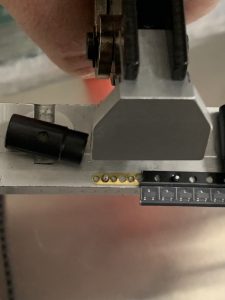
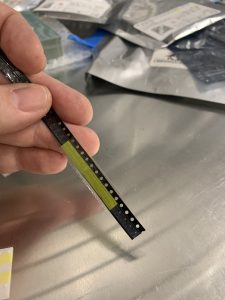
- Carefully place the leading tape in the crimping tool, making sure that it is properly aligned.
Use the provided picture for reference when placing the leading tape.
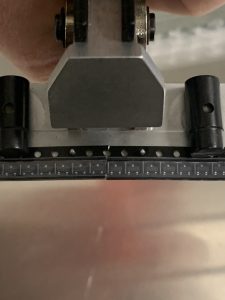
- Follow the same process with the trailing tape, making sure that it is also correctly aligned with the leading tape.
You may find that you need to trip the cut tape so that the pieces will properly connect to each other.
You want no overlap and no gap between the two pieces. We found that cutting the tape right in the middle of a pin hole makes for the easiest connect.
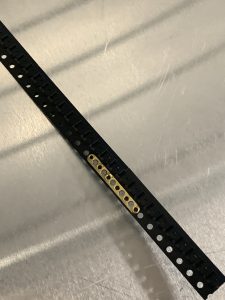
- Now it's time to use the crimping tool to secure the two pieces of tape together. Squeeze the tool to crimp the two tapes together.
- To further support the connection, we will use splicing tape. Peel off the white backing paper from the tape and place it on the back of the cut tape.
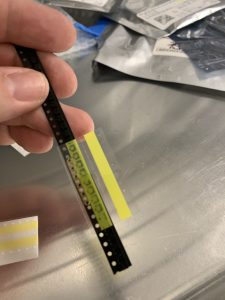
- Carefully fold the splicing tape over to connect the pull tape on each piece of cut tape. This will make sure that the tape will not come apart during the assembly process.
With the above steps completed, you now have a completed cut tape splice. Your splicing is done and you can continue with your assembly process smoothly.
Good job.